
Most expensive home repairs do not begin as expensive repairs. They begin as a stain that keeps coming back, a crack that slowly opens, a soft piece of trim, a leaking vent, or water collecting where it should not.
The hard part for a homeowner is deciding what is actually urgent. Not every crack is structural, and not every worn finish needs to be replaced. At the same time, covering an active problem with paint, caulking or new material can make it look better while the damage continues underneath.
A useful rule is this: when water is getting in, materials are moving, or the damaged area is growing, it deserves a closer look. The repair may still be small, but waiting can change the scope completely.
Fix the cause before fixing the surface
One of the most common mistakes in home repair is treating the visible damage as the whole problem.
A water stain can be repainted. Cracked parging can be covered. A soft piece of trim can be filled. Low ground can be topped up with a little soil. Those repairs may improve the appearance temporarily, but they will not last if the source of the damage is still present.
Before repairing the finish, ask three questions:
- What caused this? Was it water, movement, impact, wear, poor installation or normal aging?
- Is the cause still active? A one-time accident is different from a leak that returns every time it rains.
- How far has it travelled? The visible mark may be smaller than the affected area behind or below it.
That does not mean every problem requires demolition. It means the first repair should solve the reason the damage happened.
1. Water pooling beside the home or staying in the yard
Standing water is easy to put off because it disappears eventually. The concern is where it travels while it is there.
Water collecting beside a foundation, against exterior finishes or in the same low section of a yard can contribute to:
- Saturated soil and settlement
- Damage to grass, garden beds and hardscaping
- Deterioration of parging or other exterior finishes
- Moisture entering places it should not
- Icy walking areas after Edmonton’s temperature drops
Adding soil is sometimes part of the solution, but only when it creates a useful, stable slope and gives the water somewhere appropriate to go. If the surrounding elevations trap the water, adding material to one spot may simply move the puddle somewhere else.
A real example from our work
At Bob and Jackie’s property, the problem was water collecting in the backyard. We removed the grass, excavated the affected area and installed two drainage channels to carry water away from the problem area. The grade was corrected, and the existing grass was reused where it still made sense.
The important part of that project was not just making the yard look finished again. It was giving the water a path. Reusing suitable material also helped keep the work practical instead of replacing everything for the sake of replacing it.
For a homeowner, the lesson is simple: if the same area holds water after rain or spring melt, take photos while the water is present. Those photos often explain the problem better than a dry yard can during a later site visit.
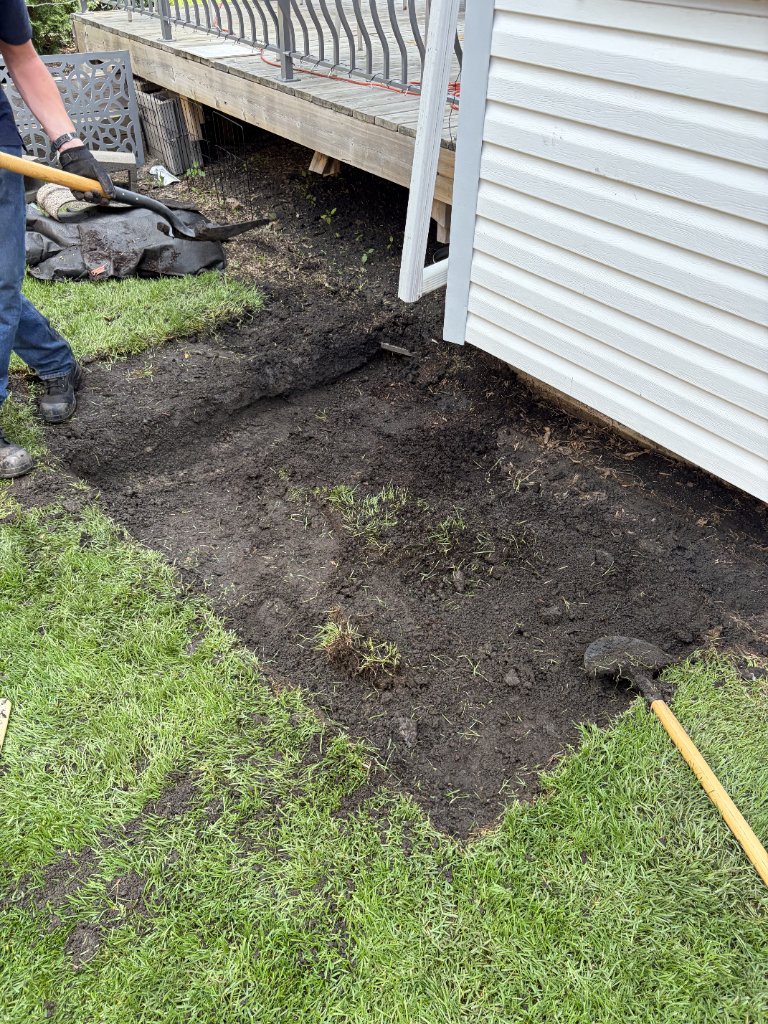
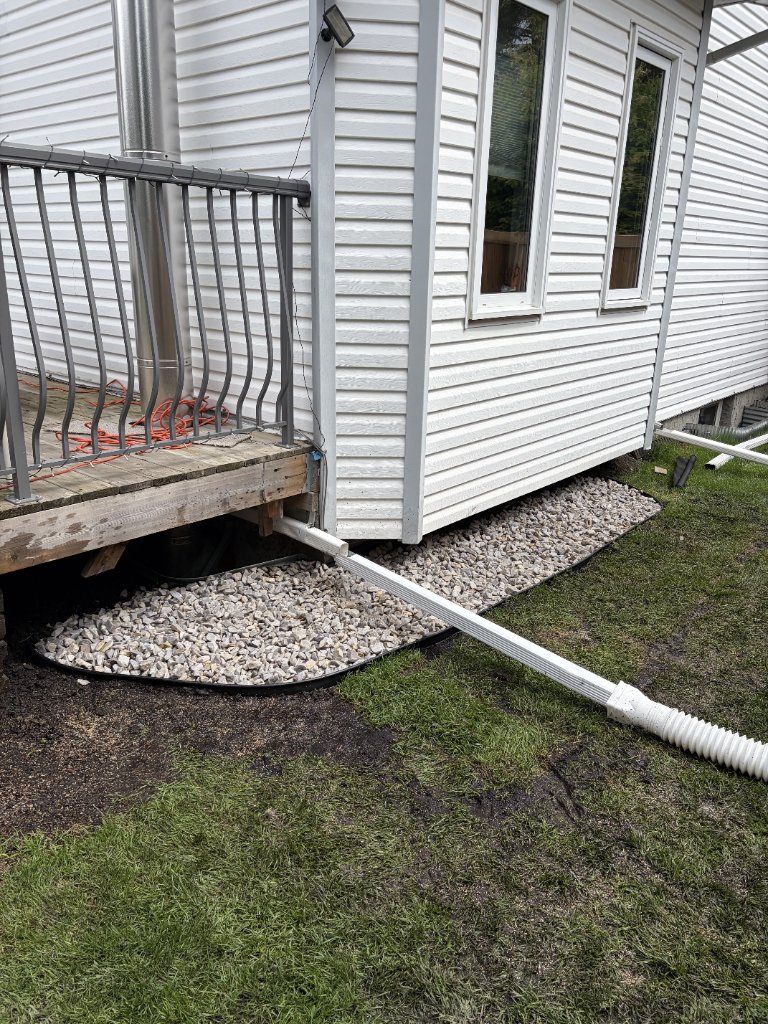
Michael’s work has enhanced the look and drainage of the area.
2. Small roof leaks and failed seals around penetrations
A roof can look generally sound and still leak at one small penetration. Vents, flashing, fasteners, skylights and other roof-mounted equipment interrupt an otherwise continuous surface. These details are often where water finds a way in.
We completed a roof-vent repair where the leaking area sat between solar panels. The failed area itself was not large, but access and working space made the repair more technical than its physical size suggested.
That is worth remembering: the size of the damaged part and the difficulty of repairing it are not always the same. A small roof leak can require careful access, safe positioning and a repair that works with the surrounding roofing system.
Watch for:
- New ceiling stains
- Damp insulation or attic materials
- Staining that darkens after rain
- Peeling paint near an exterior wall or ceiling
- Moisture around a vent, chimney or other penetration
Do not assume a stain is old simply because it feels dry today. Mark its outside edge lightly with a pencil or take a dated photo. If the discolouration expands after the next rain, the source is likely still active.
3. Cracked or loose parging and exterior finishes
Parging protects and finishes the visible exterior surface of a foundation. Small cracks and localized damage are common, especially where materials experience moisture, impact and freeze-thaw movement.
Not every parging crack means the foundation has failed. However, loose sections, open gaps and areas that continue to spread should not be ignored. Once water gets behind a weak section and freezes, the damaged area can become larger.
We have also handled parging work on a tight timeline before a homeowner’s open house. That type of job shows why timing matters: a repair may be relatively contained now, but the condition, temperature, surface preparation and curing time still determine whether it can be completed properly.
Repair is usually more reasonable when the damage is localized and the surrounding material remains well bonded. Broader failure, recurring cracking or visible movement may need more investigation before anyone promises that a patch will hold.
4. Failed caulking and open joints
Caulking is not permanent. It dries, shrinks, separates and loses flexibility over time. Open joints commonly appear around tubs, backsplashes, sinks, countertops, doors, windows and exterior trim.
The repair can be straightforward when it is caught early: remove the failed material, clean and dry the joint, and apply the correct sealant for that location.
Applying a fresh bead directly over loose, dirty or wet caulking usually creates a short-lived cosmetic repair.
Pay closer attention when:
- The material beside the joint feels soft or swollen
- Staining continues past the open seam
- Paint is bubbling
- The gap keeps reopening
- There is a musty smell or visible mould growth
Those signs suggest the job may involve more than resealing the surface.
5. Cracks, spalling and broken edges in concrete
Concrete changes over time. Hairline cracks can occur without creating an immediate structural concern, but broken edges, flaking surfaces and cracks that collect water deserve attention.
In Edmonton, water entering a crack can freeze and expand. Repeated freeze-thaw cycles can widen an opening and loosen more material. A damaged edge can also become a trip hazard long before the rest of the slab needs replacement.
Localized concrete or garage-floor repairs can make sense when the base is stable and the damage is limited.
Replacement becomes more likely when there is major settlement, widespread deterioration, poor drainage below the slab or repeated movement that a surface patch cannot correct.
Before choosing a repair, look at the whole area—not only the crack. Check whether the two sides remain level, whether water sits there, and whether the opening has changed over time.
6. Interior stains, bubbling paint and soft drywall
Drywall and paint often reveal a problem that began somewhere else.
A small stain below a bathroom, beneath a window or near an exterior wall can come from plumbing, failed seals, condensation or exterior water entry. Repainting it before finding the source only resets the clock.
The correct order is:
- Identify where the moisture came from.
- Stop the source.
- Allow the area to dry properly.
- Remove or repair material that cannot be saved.
- Restore the finished surface.
If the drywall is soft, sagging or actively wet—or if water is near electrical fixtures—treat it as more than a cosmetic issue.
7. Loose trim, damaged boards and exposed wood
One loose board or small section of damaged trim does not always justify replacing an entire assembly. In many cases, selective repair is the better-value option.
The deciding factor is the condition of the material behind and around the visible damage. A board loosened by impact may only need to be secured or replaced locally. Wood that is repeatedly wet, badly rotted or failing across several areas points to a larger moisture or installation problem.
Paint and stain protect wood only when the surface beneath them is still sound. Peeling finishes, exposed end grain and open joints should be corrected before weather has more time to work on them.
How to decide what needs attention first
When several repairs are competing for the same budget, prioritize them in this order:
- Active water entry or drainage problems
- Safety hazards, including loose materials and trip hazards
- Damage that is visibly spreading
- Open exterior surfaces exposed to weather
- Functional problems
- Cosmetic improvements
This order is not exciting, but it protects the home. New paint is satisfying; stopping the water that would ruin it again is more important.
What to document before calling a contractor
You do not need to diagnose the problem yourself. A few useful details can make the first conversation much more productive:
- Take one wide photo showing where the problem is located.
- Take close photos showing the damaged material.
- Photograph water while it is present, not only after it dries.
- Note when you first noticed the issue.
- Explain whether it changes after rain, snowmelt, cold weather or use of a nearby fixture.
- Mention any previous repair in the same area.
- If safe, measure the approximate length and width of the affected area.
This information helps separate a contained repair from a problem that may require a more involved inspection.
A smaller repair is only valuable if it solves the problem
We believe in preserving usable materials and keeping the scope practical when the condition allows it. That does not mean applying the cheapest patch to everything. A low-cost repair that fails again next season is not good value.
The goal is to understand the cause, repair what actually needs attention and avoid disturbing sound work unnecessarily.
Sometimes that means a small, targeted repair. Sometimes opening the area reveals damage that could not be seen from the surface. A responsible estimate should be clear about that possibility before work begins.
If something around your home has started leaking, cracking, shifting or holding water, you do not need to wait until you know exactly what the repair is called. Send us a few photos and explain what you have noticed. We can help determine the most useful next step.